
Brow lamination is the technique behind those brushed-up, tidy, fuller-looking brows, with no microblading and no daily brow gel. This guide explains what it is, how it is done step by step, who it suits (and who it doesn’t), how long it lasts, how often it can safely be repeated, aftercare and how to combine it with a brow tint.
The timings in this guide are manufacturer examples. The instructions for the product you are using always take priority.
What is brow lamination?
Put simply, it is a perm for your brows. Healthline describes it as a semi-permanent procedure that perms the brow hairs so they look fuller and more even and stay in place. There are no needles and no pigment in the skin: only the hair is treated.
The chemistry is the same as a lash lift: a first, reducing product (at an alkaline pH) breaks some of the disulfide bonds in the keratin so the hair can be redirected, and a second, oxidising product (the neutraliser or fixer) re-links them in the new direction. A nourishing product then helps offset the dryness the chemicals cause.
Who it suits (and who it doesn’t)
According to Healthline, it can be a particularly good fit for people who:
- Have thin or thinning brows, including thinning with age.
- Have gaps from over-plucking or over-waxing.
- Have unruly hairs that won’t stay put.
- Want more shape or symmetry and would rather not use brow gel every day.
Contraindications
- Sensitive skin, rosacea, eczema or a history of contact dermatitis: Healthline says it may not be recommended, and that anyone with a chronic skin condition should check with a dermatologist first.
- Broken skin, irritation or active inflammation in the area: these compromise the skin barrier, so the treatment should be postponed.
- A reaction to the patch test or previous reactions to perm lotions or tints.
- Microblading on the same day: combining them is not advised; one professional source recommends leaving at least five weeks between the two.
If your client takes medication that affects the skin or has any medical concerns, they should check with their doctor before the appointment.
Patch testing
A patch test is recommended before the first treatment, using the same products you will use on the day. A common professional protocol (Elleebana) is to apply a small amount behind the ear or on the inner elbow at least 48 hours beforehand, leave it for about 10 minutes and then remove it. If redness, itching, swelling or irritation appears in that time, do not go ahead, and the client should see a healthcare professional. If you are tinting in the same session, include the tint too. A clear result does not completely rule out a reaction.
What you need for brow lamination
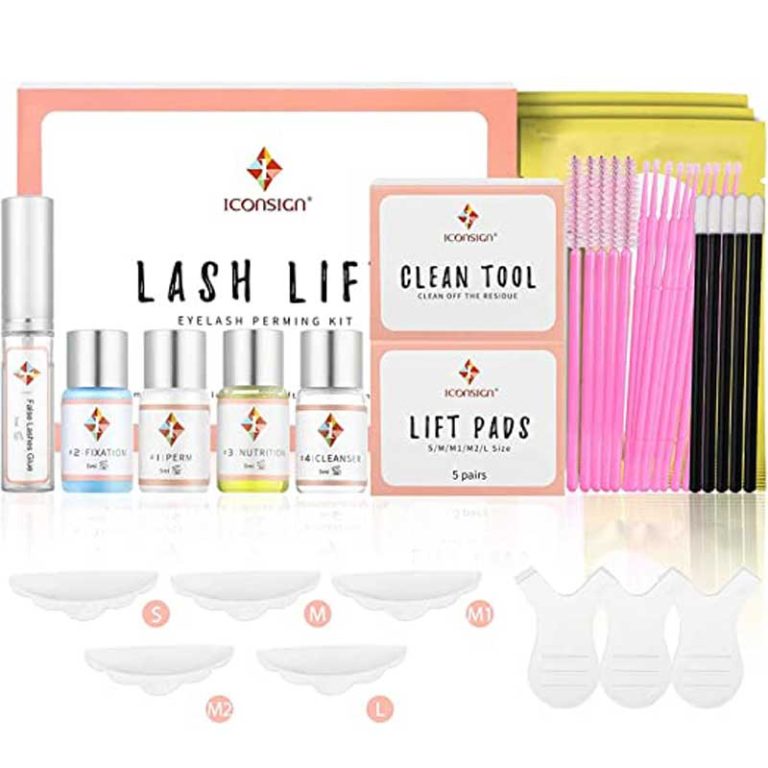
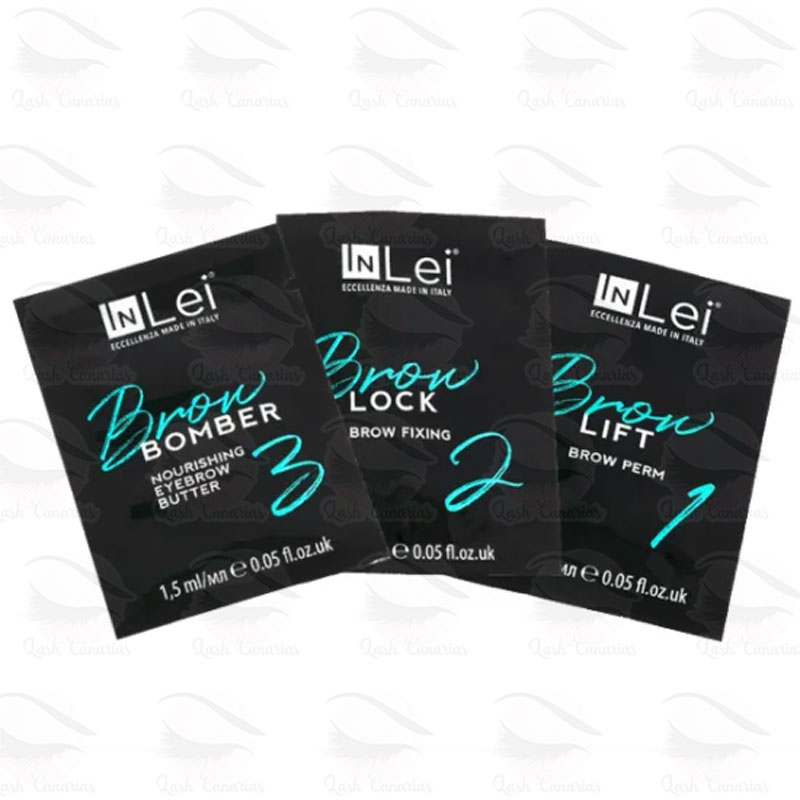
- Lamination products from a single brand: step 1 (lotion), step 2 (fixer) and a nourishing step. Our Lamination range includes, for example, the Lash & Brow Lift Kit and InLei Brow Bomber single-use sachets.
- Disposable brushes and applicators: disposable lash and brow spoolies and micro brushes, in Accessories.
- A cleanser for the area, dry and damp cotton pads, a timer and, if the brand calls for it, cling film.
- Brow tint and developer, if you are combining services.
One important detail: InLei explicitly warns that its brow lotion must never be used on the eyelashes, as it can cause serious eye damage, and that products from different brands should not be combined. Keep your brow and lash kits clearly separated in the treatment room.
How brow lamination is done, step by step
- Consultation: check the area, ask about allergies and recent treatments, and confirm the patch test.
- Cleanse the brows thoroughly to remove oil and make-up.
- Step 1 – lotion: brush the hairs in the desired direction and apply the lotion evenly over every hair. Remove as instructed (InLei: with a dry cotton pad), making sure none is left before the next step.
- Shaping: position and brush the hairs into their new direction before fixing.
- Step 2 – fixer: apply it the same way as step 1, check the hairs are still correctly placed and stick to the time. Remove (InLei: with a damp cotton pad).
- Tint (optional): after the fixer.
- Nourish: a nourishing oil or balm to reduce dryness and irritation.
- Finishing: tidying stray hairs or shaping, which Healthline mentions as common add-ons.
According to Healthline, the whole process takes an hour or less.
Example timings: the InLei Brow Bomber protocol
For reference, these are the instructions published by an official distributor for InLei’s brow system. Other brands use different timings.
| Step | Indicative time | Manufacturer notes |
|---|---|---|
| Brow Lift 1 (lotion) | 6–8 min fine hair · 8–10 min medium · 10–12 min thick | Apply evenly with a brush; remove with a dry cotton pad |
| Brow Lock 2 (fixer) | 5–8 min (half of step 1 + 2 min) | Do not change the hair direction by more than 65° from natural growth; remove with a damp cotton pad |
| Brow Bomber 3 (nourishing) | 5 min | After tinting or after step 2; blot off any excess with a tissue |
Combining lamination with a brow tint
Tinting is a common add-on to intensify or change the brow colour. In InLei’s protocol, the tint goes on after the fixer and before the nourishing step. Some professional guides tint in the same session and others afterwards, at the technician’s discretion. What you should avoid is piling more chemicals onto the brows in the following days: Fresha advises no waxing, threading or tinting for at least 48 hours after lamination. Remember to include the tint in the patch test.
How long does brow lamination last?
Sources quote 4 to 6 weeks (InLei, via its distributor) and up to around 8 weeks, depending on hair type, skin and aftercare. The effect fades as treated hairs shed and new ones grow through. Fresha estimates that by week 6 the lift is at roughly 60% of its week-one strength.
How often is it safe to repeat?
Here the sources broadly agree: not sooner than 6 weeks. Healthline warns that repeating it earlier increases the risk of damage, and Fresha gives the same figure because treatments that are too close together weaken the brow hair. In practice, many clients repeat every 6–8 weeks. If the brows feel dry, brittle or are breaking, wait longer and let them recover.
Aftercare
| When | What to avoid or do |
|---|---|
| First 24 hours | No water, steam, sweat or products on the brows; keep your face out of the shower spray. No make-up on the area. |
| First 48 hours | Avoid saunas, steam rooms, very hot water, swimming pools and the sea. Intense exercise: wait at least 24 hours, ideally 48. Retinoids near the brows: 48 hours. |
| First 72 hours | Avoid chemical exfoliants (AHAs, BHAs) near the brows. |
| First night | Sleep on your back; don’t rub or touch the brows. |
| Day to day | Brush with a clean spoolie and apply a nourishing oil or cream to prevent dryness. |
The table is based mainly on Fresha’s aftercare guide; Healthline adds the advice to nourish the brows with an oil or cream every night. As the sources do not agree on everything (for example, when make-up can go back on), give your client the instructions for the brand you use in writing.
Warning signs
Burning that does not go away, swelling of the skin or eyelid, intense itching with a rash, welts, weeping skin or any change in vision are reasons to see a healthcare professional. Redness lasting more than 24 hours, or brows that feel “fried” or brittle, are reasons to review the treatment with the technician.
Common mistakes
- Over-processing: leaving the lotion on too long leaves hairs weak, brittle and prone to breakage.
- Not adjusting timing to the hair type: porous or weakened hair processes faster and is damaged more easily.
- Not fully removing the lotion before the fixer, so the two products mix.
- Forcing the direction of the hair beyond what the manufacturer allows.
- Repeating within 6 weeks or adding more chemical treatments in the following days.
- Pulling the hairs too hard during the treatment: it can cause temporary hair loss.
- Using brow products on lashes or mixing brands.
Lash Canarias supplies mentioned in this guide
- Lash & Brow Lift Kit
- InLei – Brow Lamination Solutions
- Disposable Brush For Lashes and Eyebrows
- Microbrushes 100
Frequently asked questions
How long does brow lamination last?
Between 4 and 6 weeks according to the manufacturer we checked, and up to around 8 weeks in some cases. It depends on hair growth, brow type and aftercare in the first 24–48 hours.
How often can I have my brows laminated?
No sooner than every 6 weeks, according to Healthline and Fresha. Most people repeat it every 6–8 weeks, and should wait longer if the brows feel dry or brittle.
Can I have a brow tint on the same day?
Yes. In protocols such as InLei’s, the tint goes on after the fixer and before the nourishing step. What you should avoid is tinting, waxing or threading in the 48 hours after lamination.
When can I wash my face?
Keep the brows dry for the first 24 hours. After that you can wash your face gently, avoiding rubbing the area and patting it dry.
Does brow lamination damage the hair?
Done properly, with the right timings and at least 6 weeks between sessions, it is considered low-risk. The main risks are skin irritation, dry hair from over-processing and, if product reaches the eye, eye injury.
Sources
- Healthline – Brow lamination
- Fresha – Brow lamination aftercare
- Browstar Cosmetics – InLei Brow Lift 1
- Browstar Cosmetics – InLei Brow Lock 2
- Browstar Cosmetics – InLei Brow Bomber 3
- InLei – Brow Bomber Step 1 (usage warnings)
- Lash Lift Store – How often can brow laminations be done?
- Elleebana – Patch testing for lash and brow services
- Cursa – Brow lamination: chemistry, protocol and safety (Spanish)
- Permanent Wave Chemistry: Disulfide Bonds & Waving Lotions